

Perform.AI only reads the relevant Shopify data (orders, fulfillments, product images); it never writes back to your store.
Step 1 — Create the integration in Perform.AI
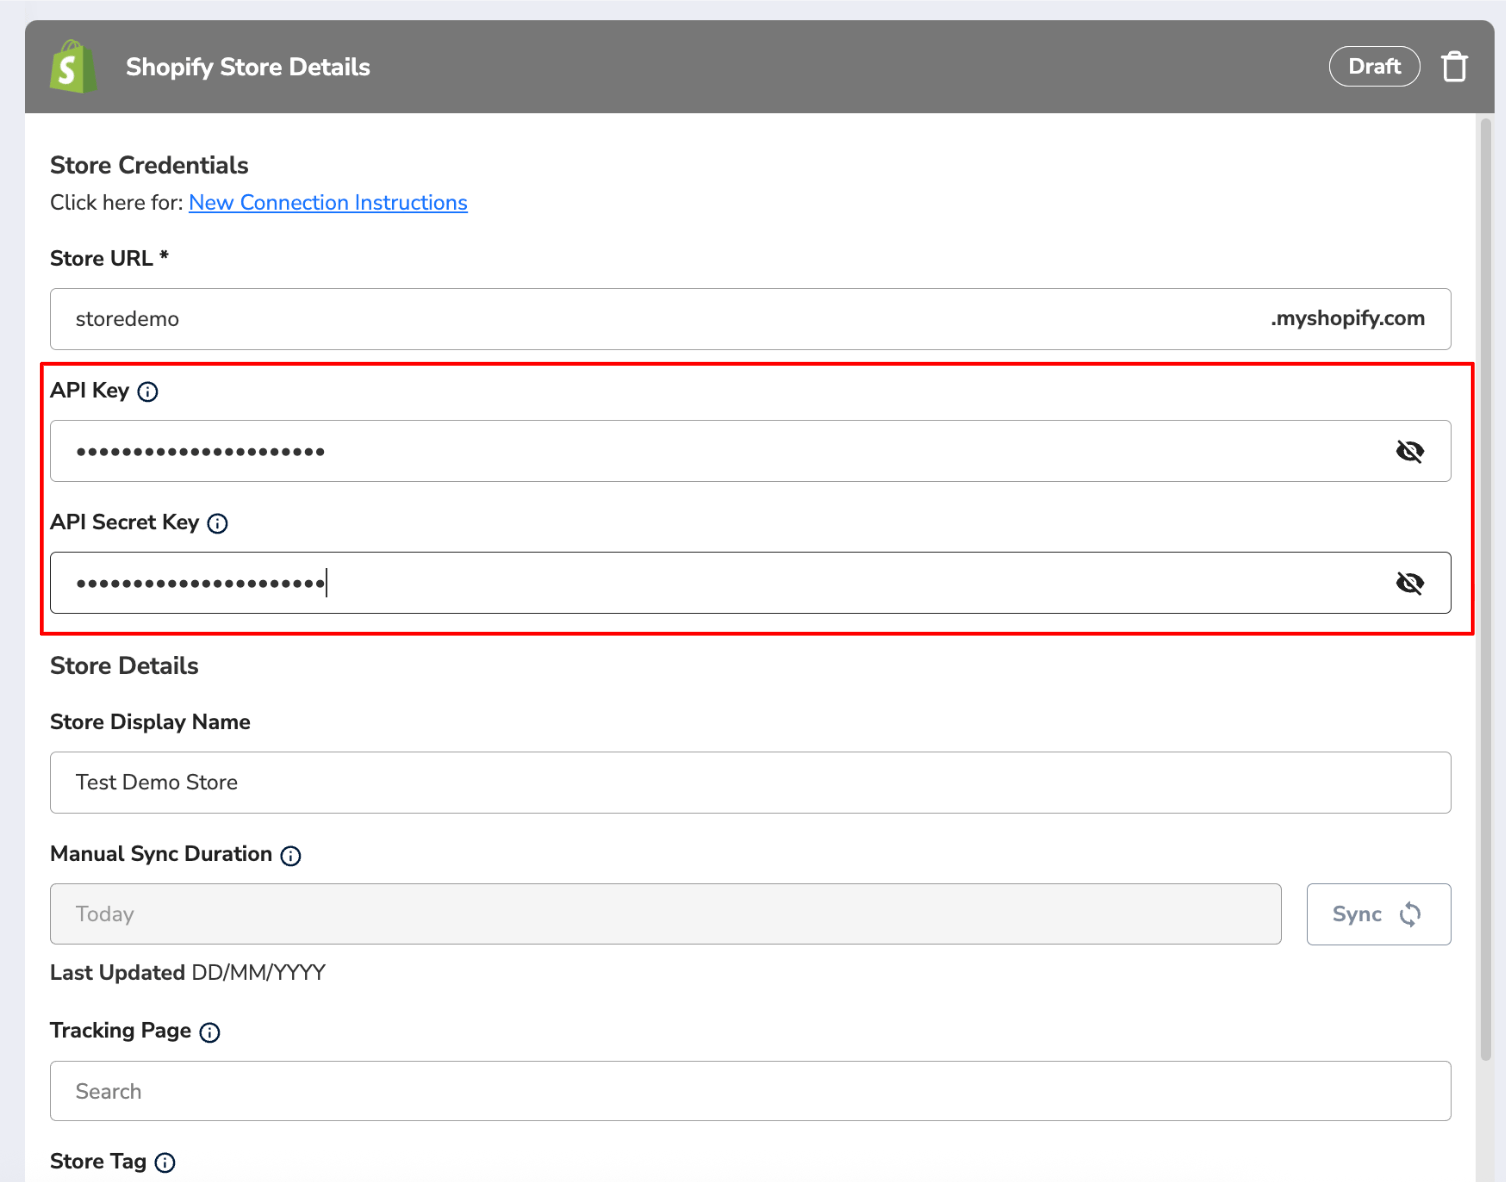
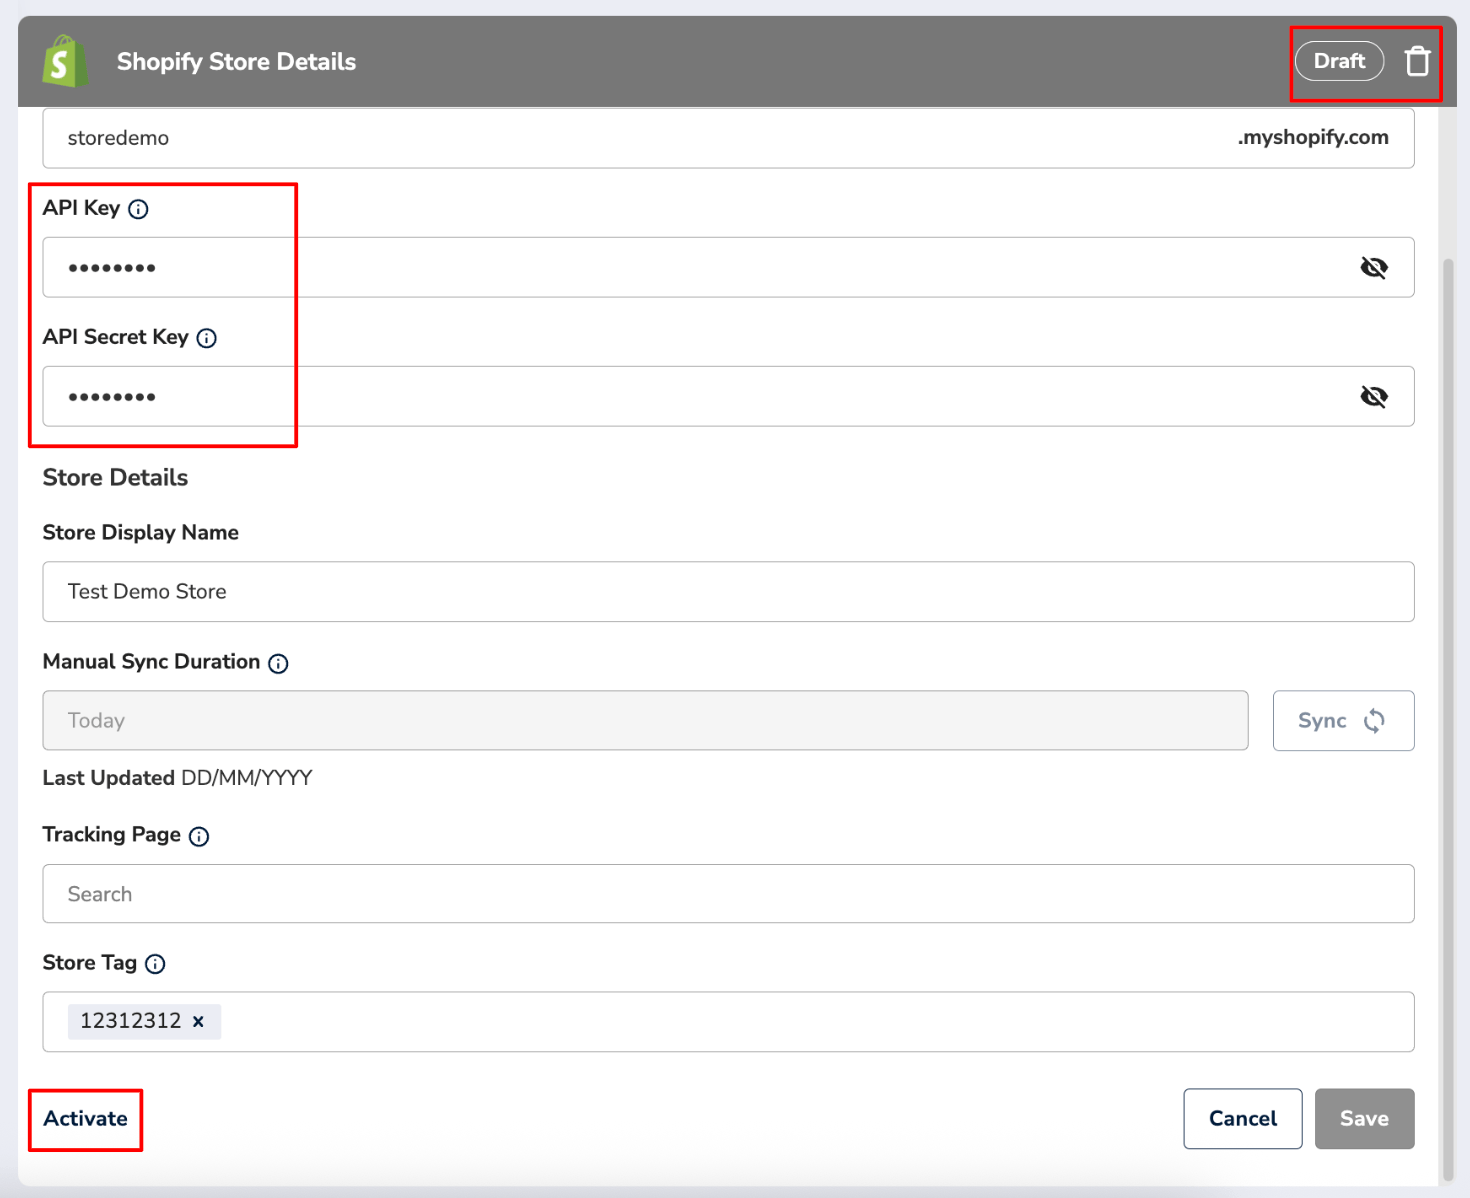
In your account, open the Integrations page and select Add Store. The configuration panel asks for: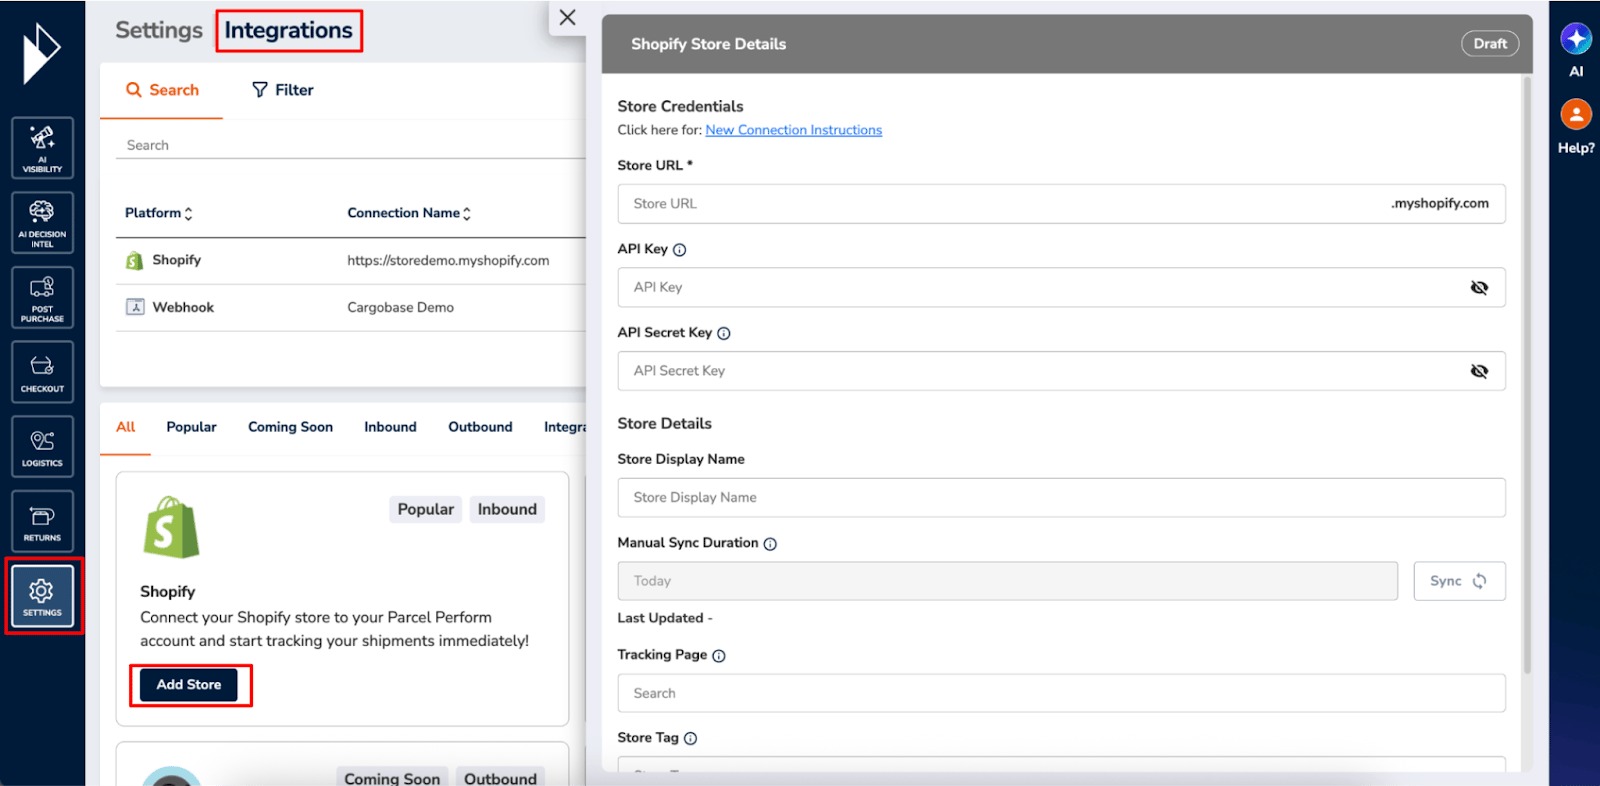
Store details (all optional)
- Store Display Name — defaults to the store name retrieved from Shopify; also stamped on imported shipments.
- Tracking Page — link imported shipments to one of your tracking pages for consumer notifications and tracking.
- Store Tag — tags added to every shipment imported from this store.
- Manual Sync Duration (activated integrations only) — shipments flow in automatically, but you can re-pull history on demand: Today, Last week, Last month, or Last three months, then Sync.
Step 2 — Create a Shopify app and retrieve credentials
The integration authenticates through an app you create in Shopify’s Dev Dashboard.1
Open app development
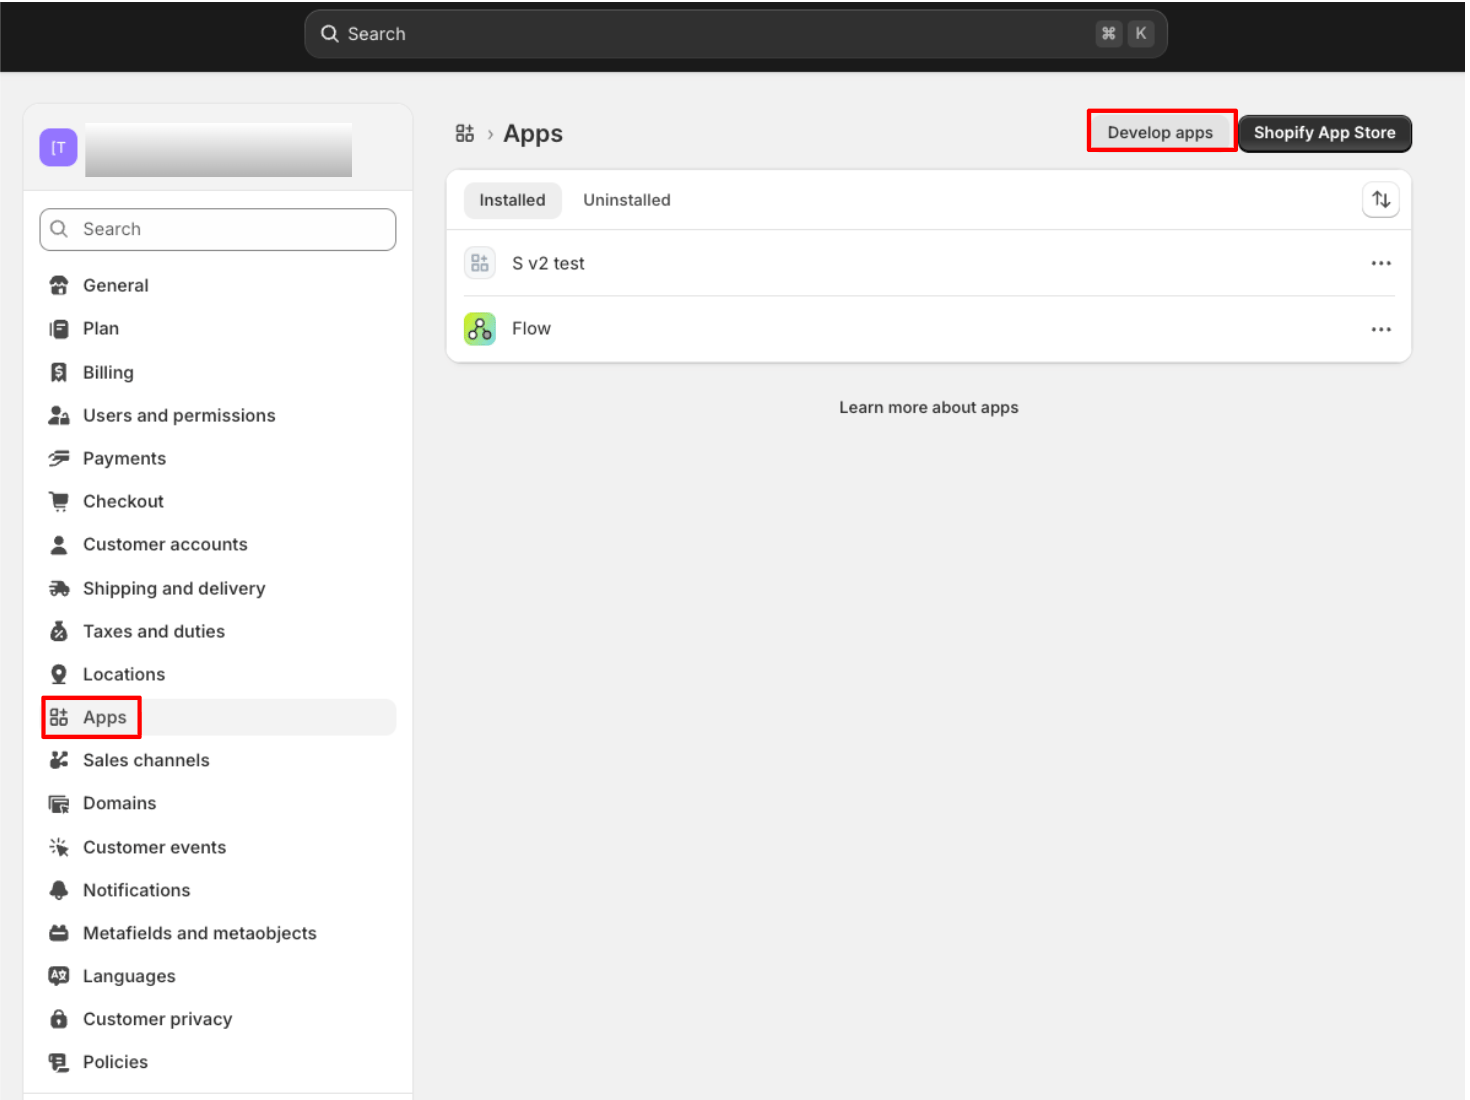
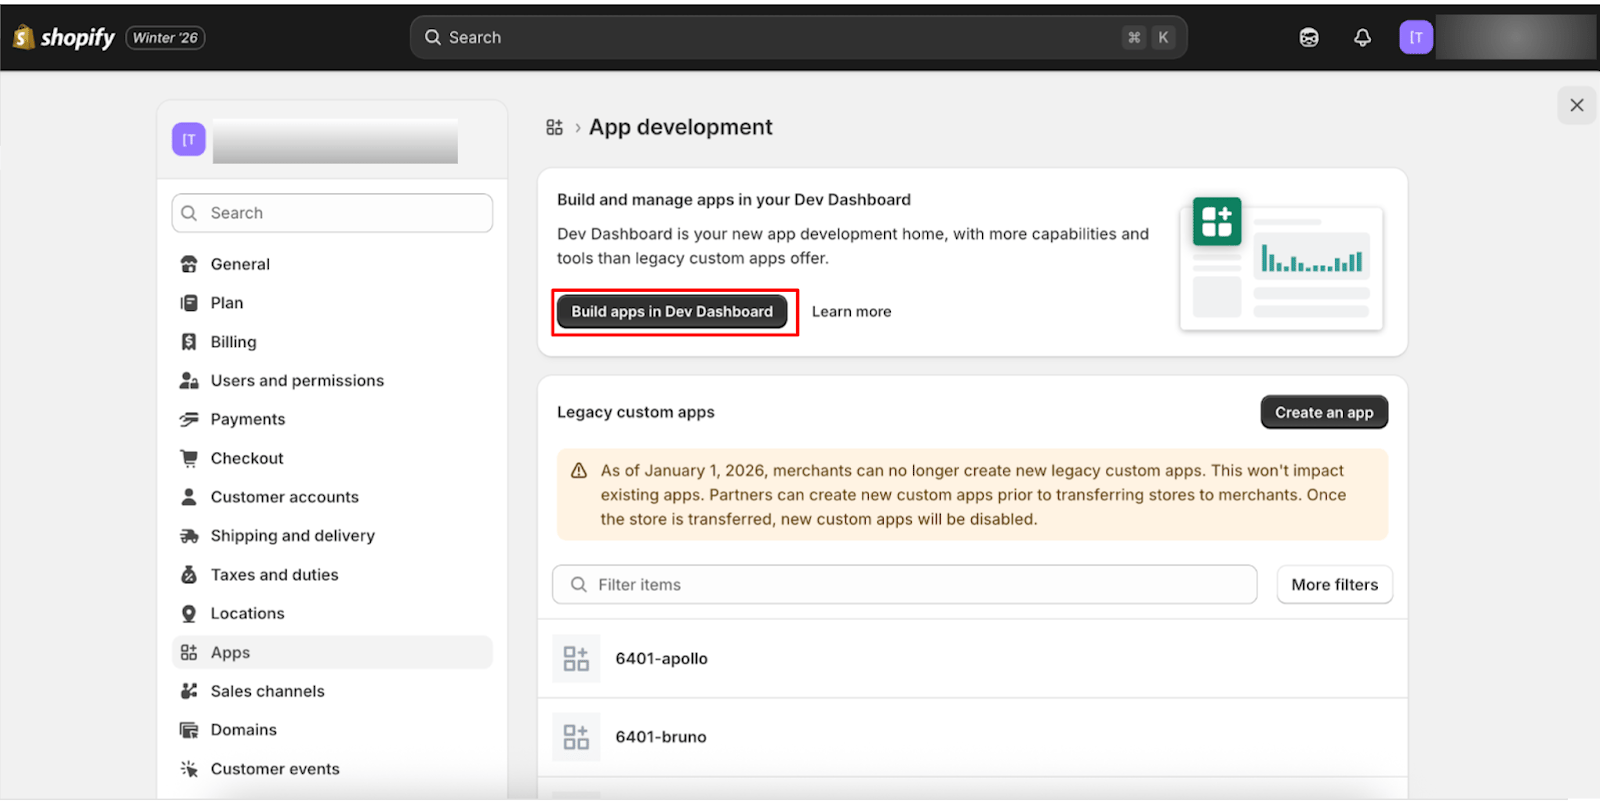
Log in to your Shopify store, go to Settings → Apps → Develop apps, and select Build apps in Dev Dashboard.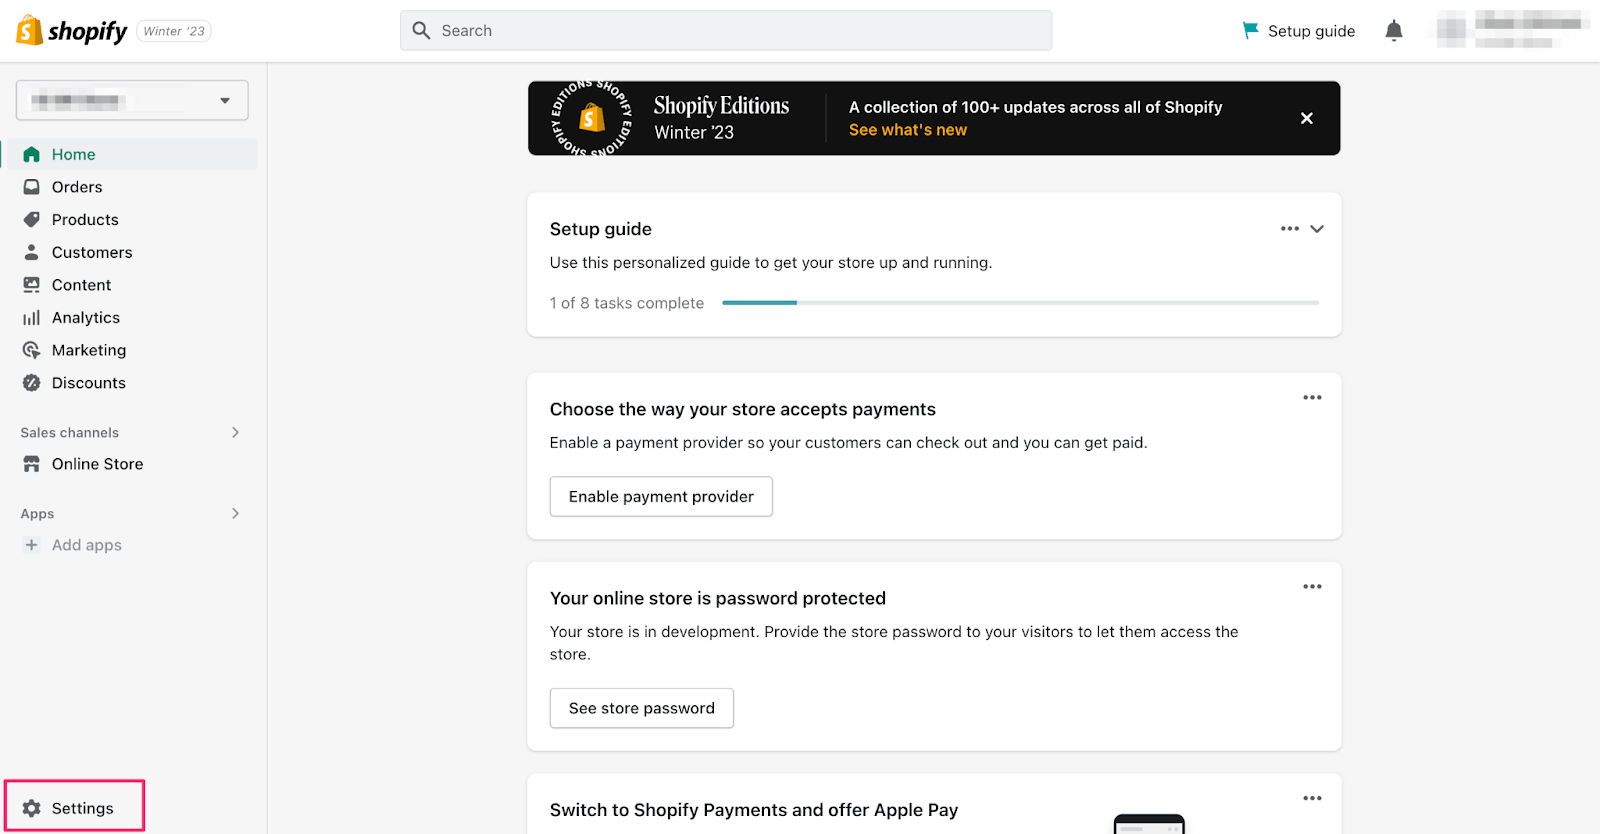
2
Create the app
Select Create app and name it — any name works; we recommend 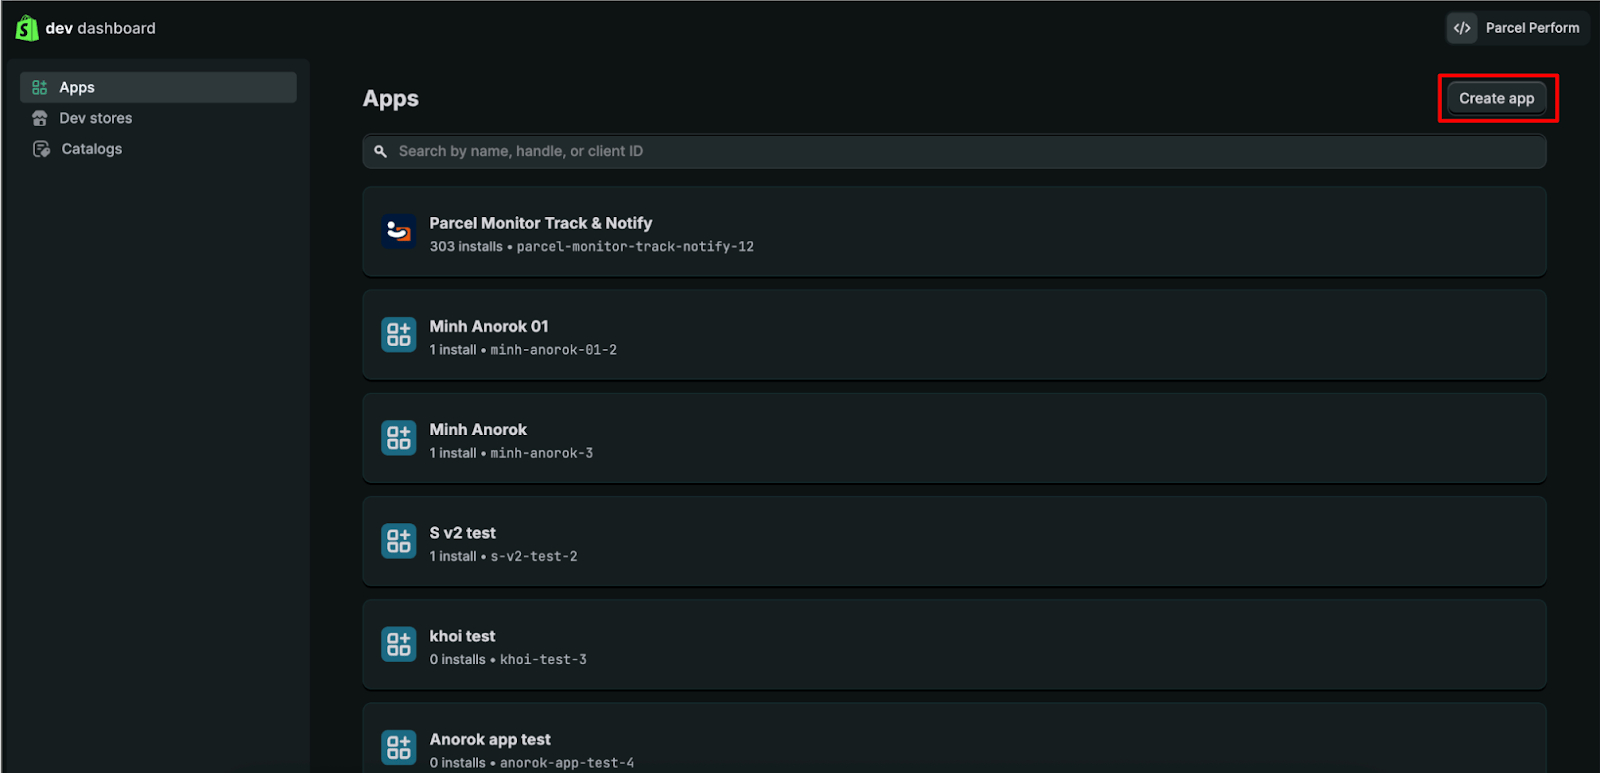
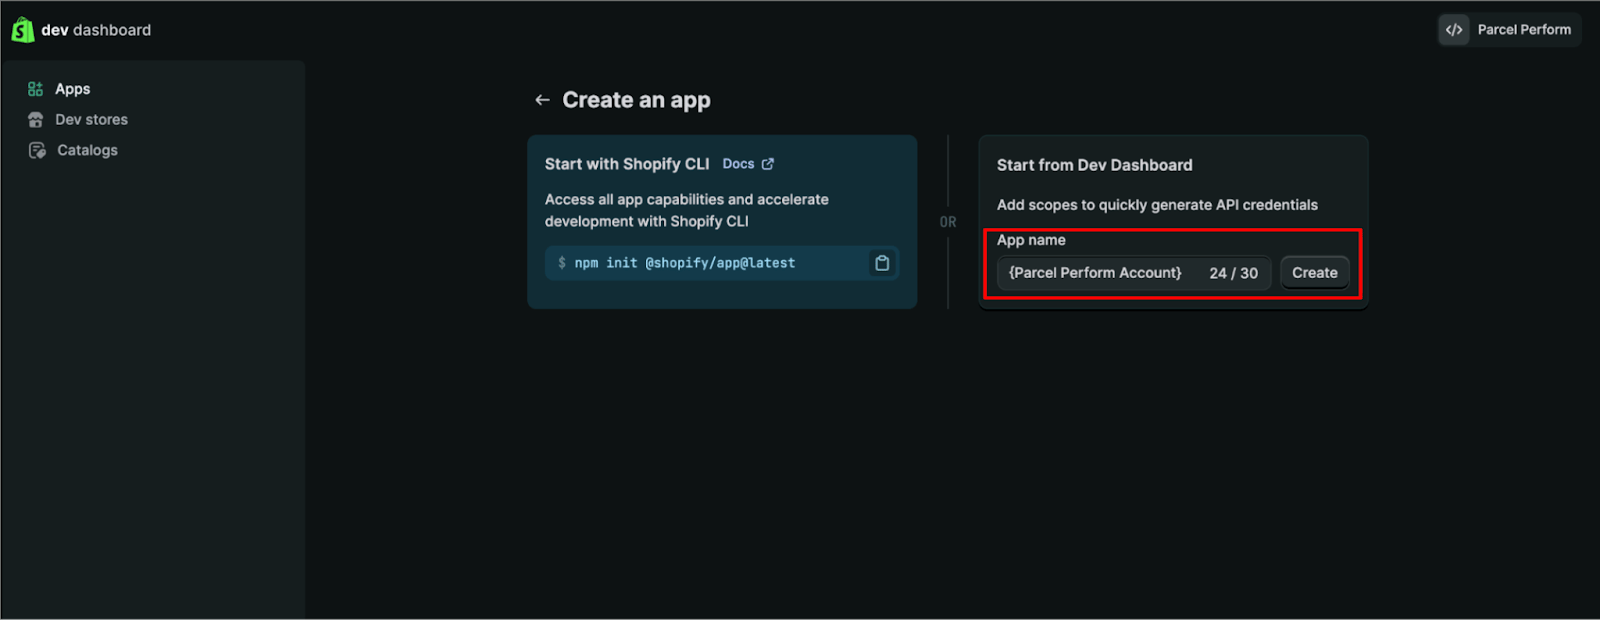
Perform.AI Integration - {your account name}.3
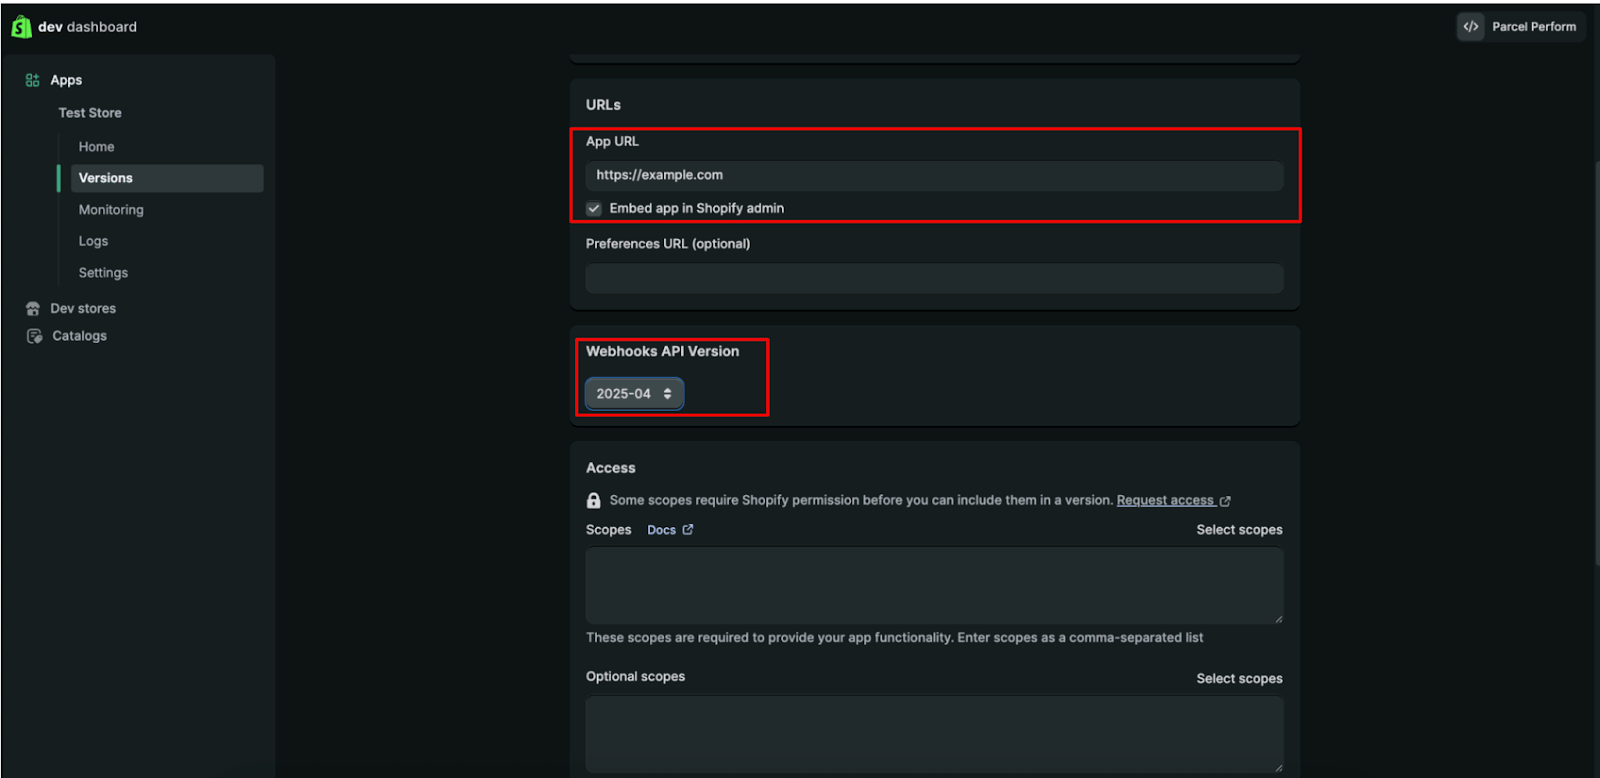
Configure the app version
On the Versions page:
-
Set the App URL to
https://www.parcelperform.comand uncheck “Embed app in Shopify admin” — there is no UI to embed; a successful install simply redirects to that website. -
In Webhook API Version, select the oldest available version. Shopify updates versions quarterly with fall-forward logic — picking the oldest means you set this once and never need to update it.
4
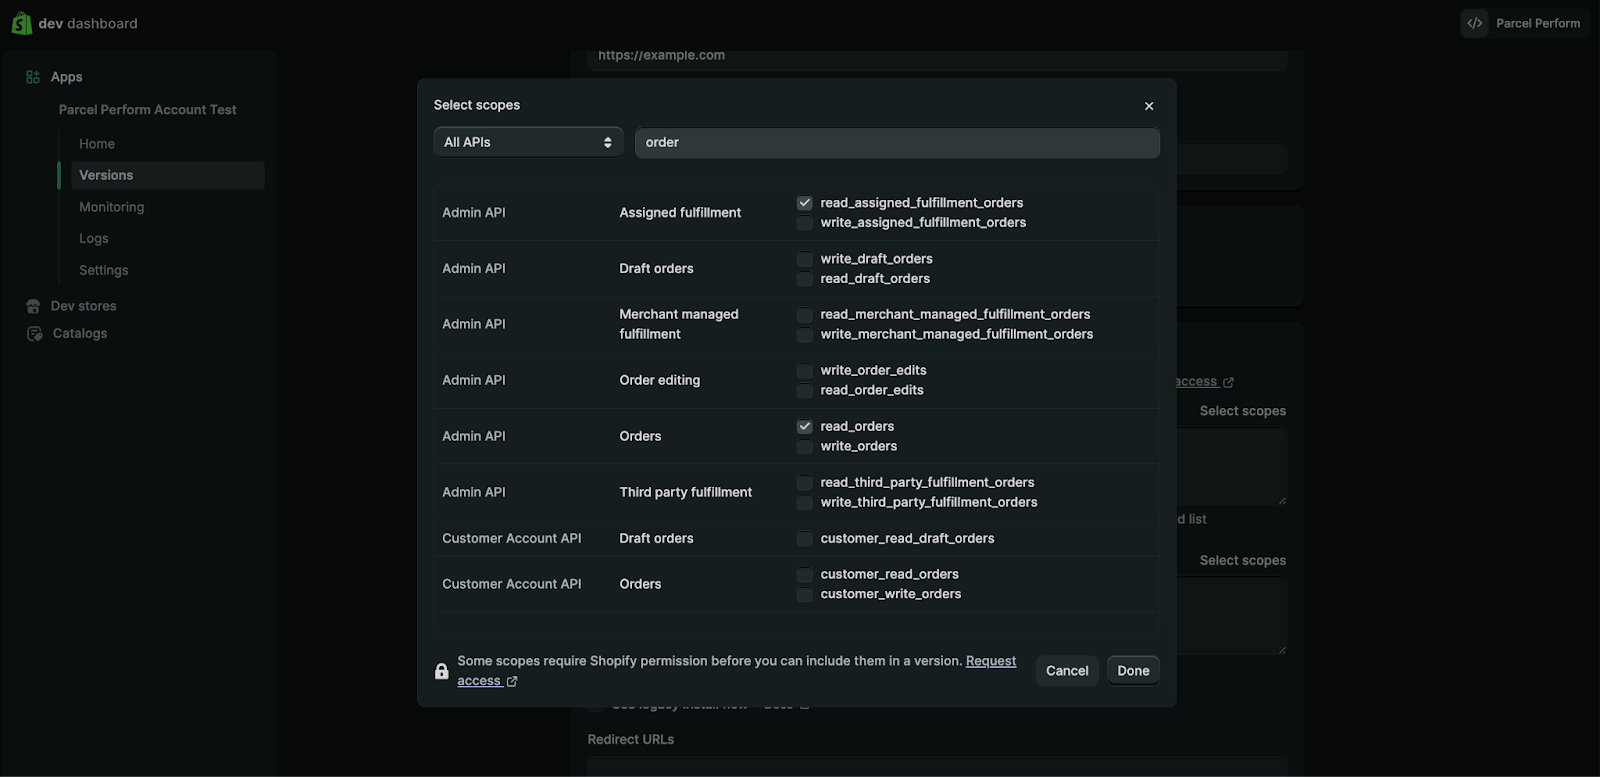
Select access scopes
In the Access section, select these four scopes — all read-only, and all mandatory for the integration to work: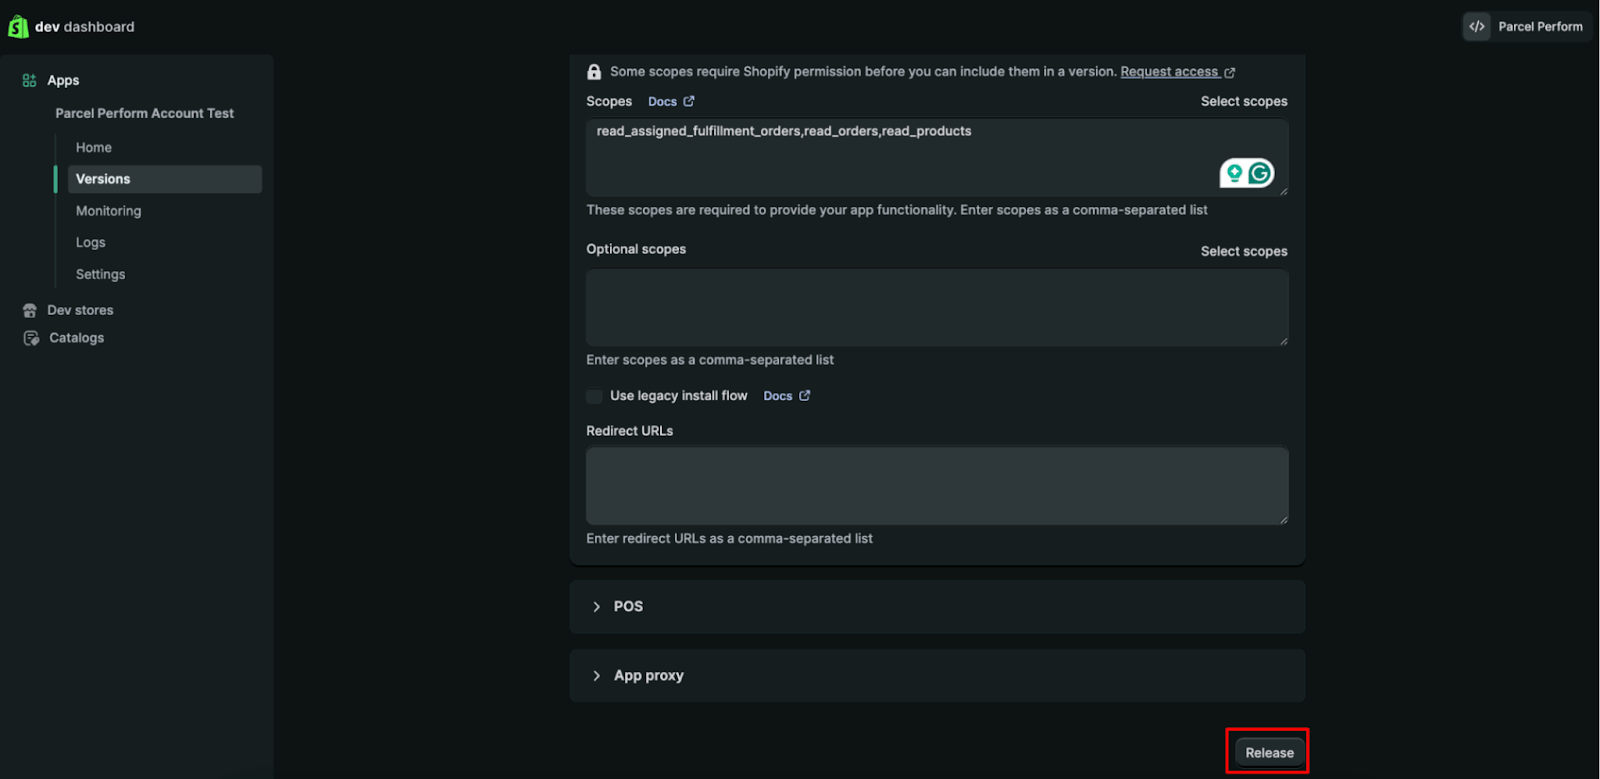
-
read_orders— order and shipment information -
read_products— line-item product images -
read_assigned_fulfillment_orders— fulfillment order information -
read_fulfilments— fulfillment information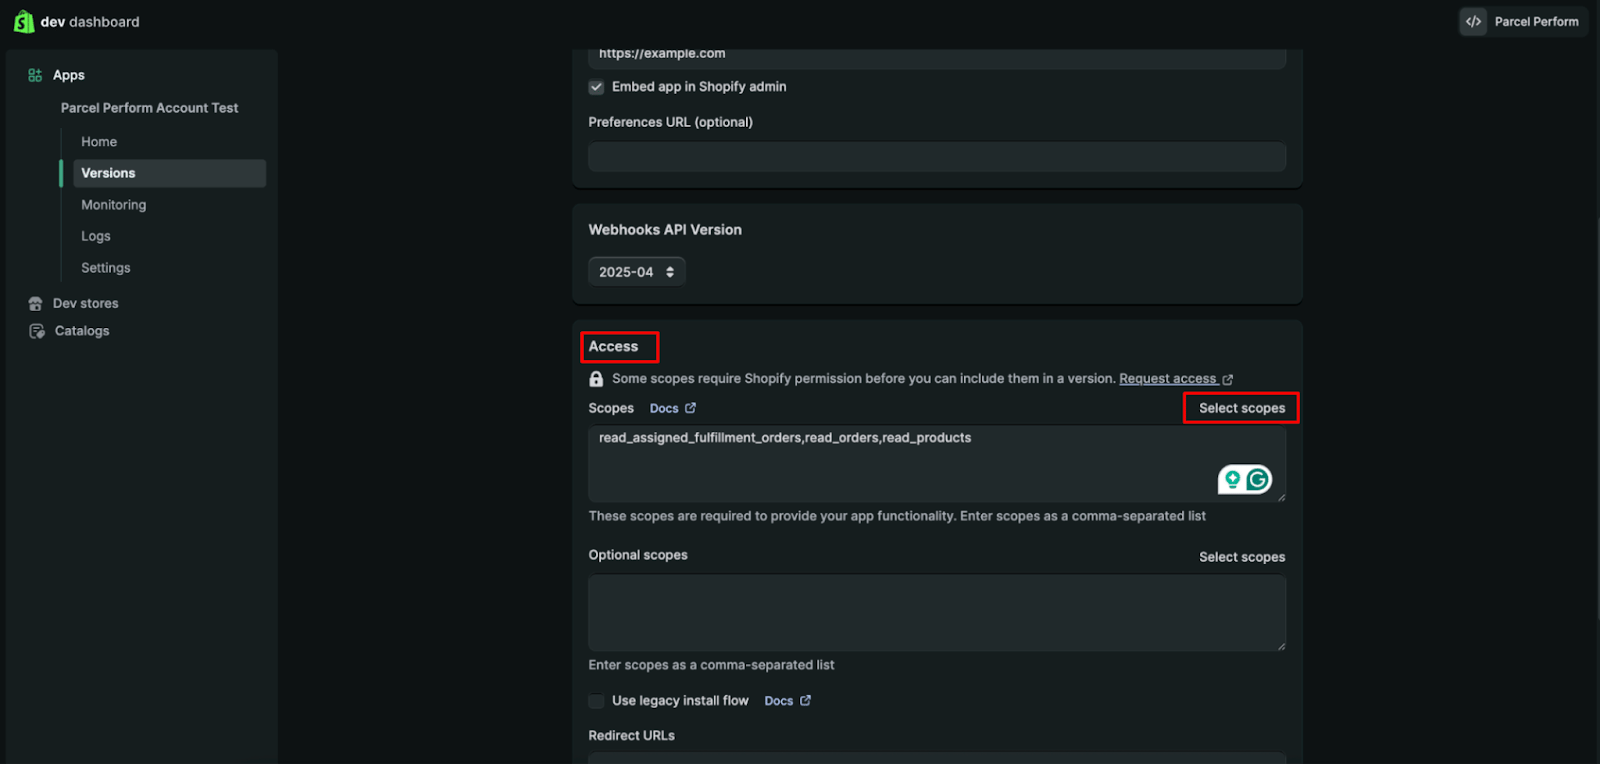
5
Set the contact email
Open the app’s Settings tab — your Client ID and Secret live here (no access token is required). Scroll to Contact Information, select Edit, and enter 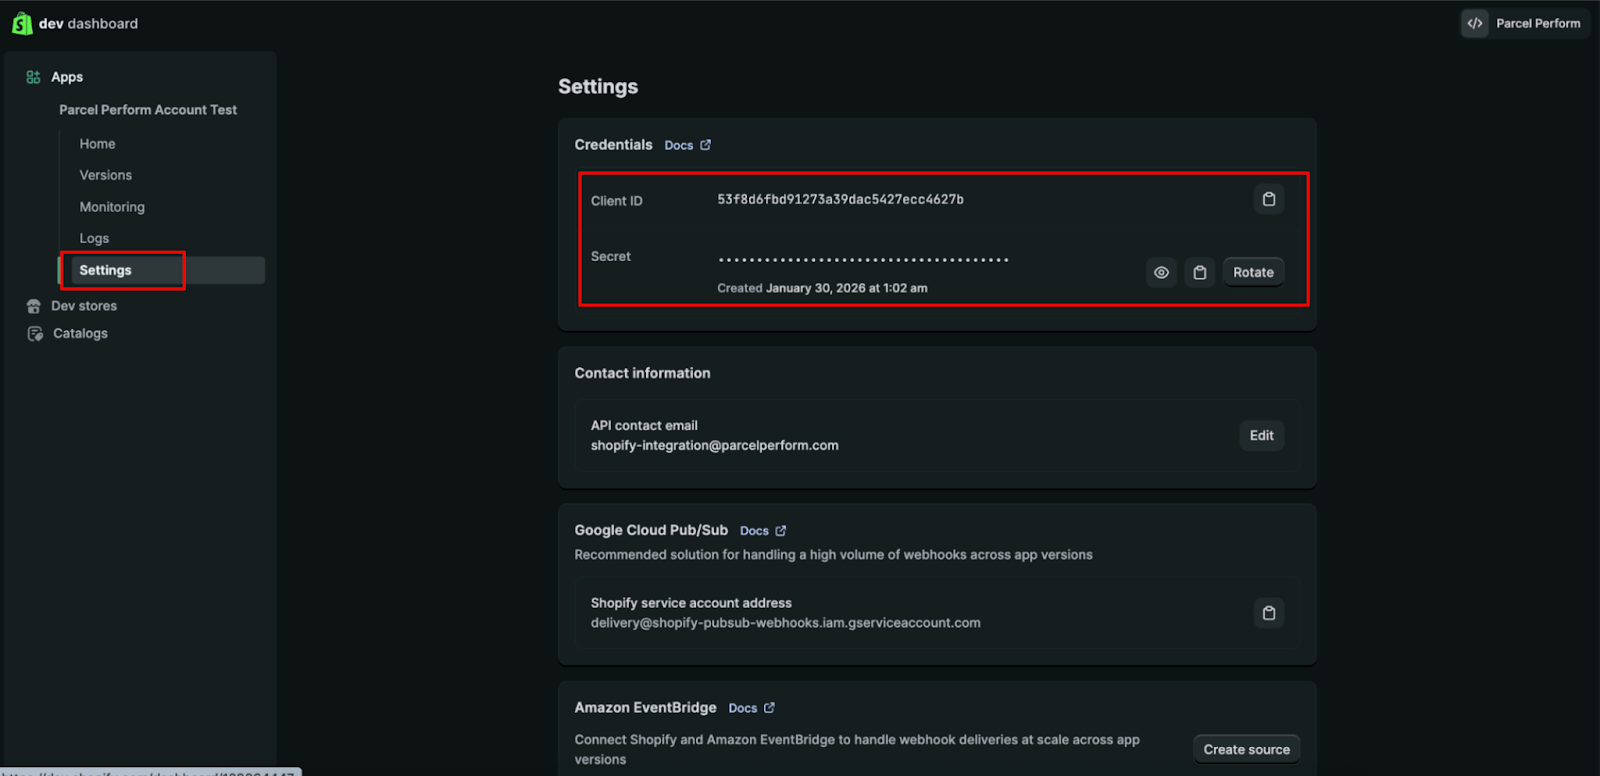
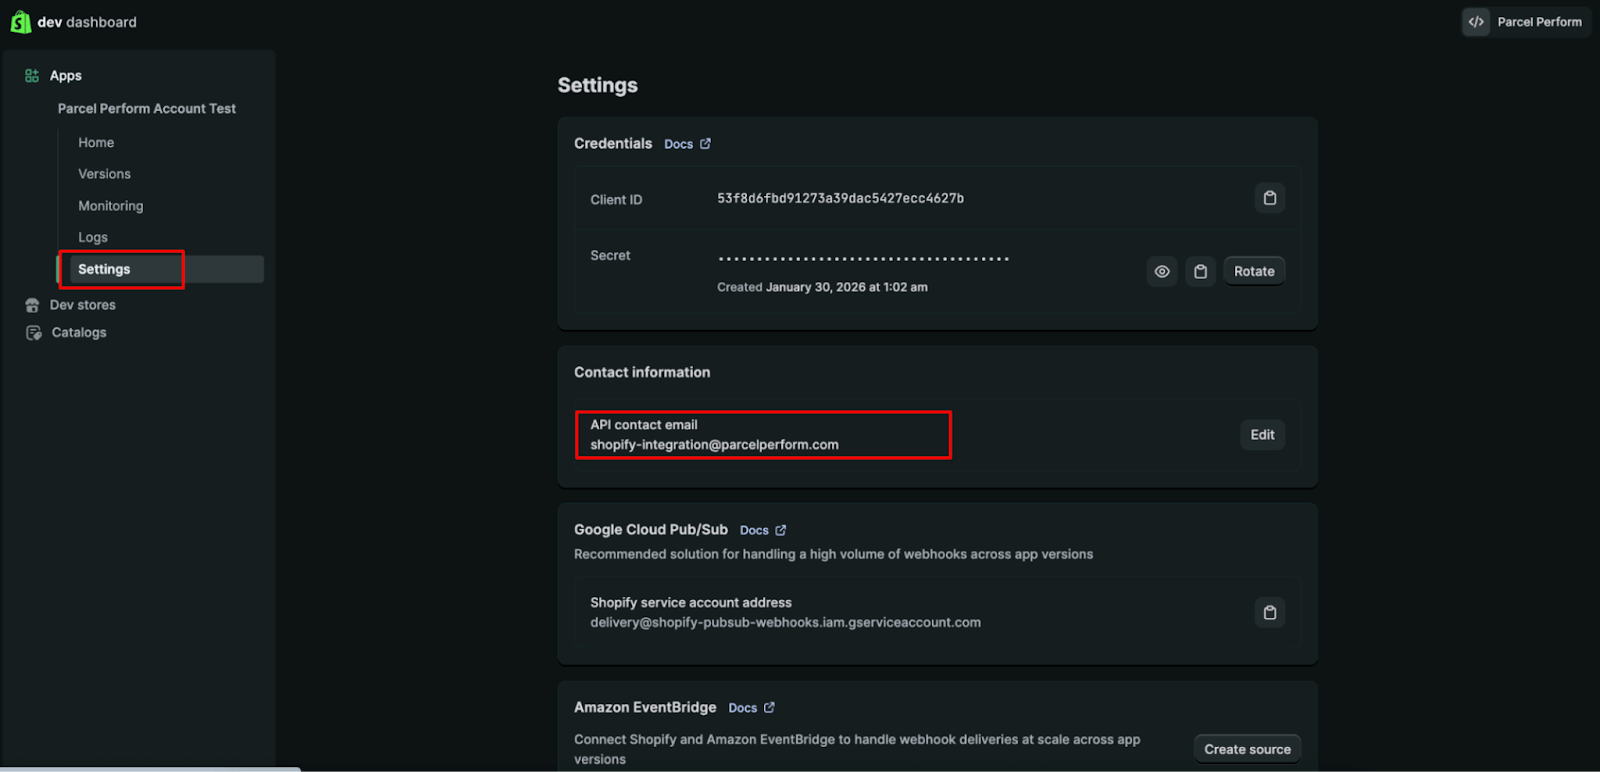
shopify-integration@parcelperform.com — this lets Perform.AI receive Shopify’s notices about your app and fix issues quickly. Save.6
Install the app to your store
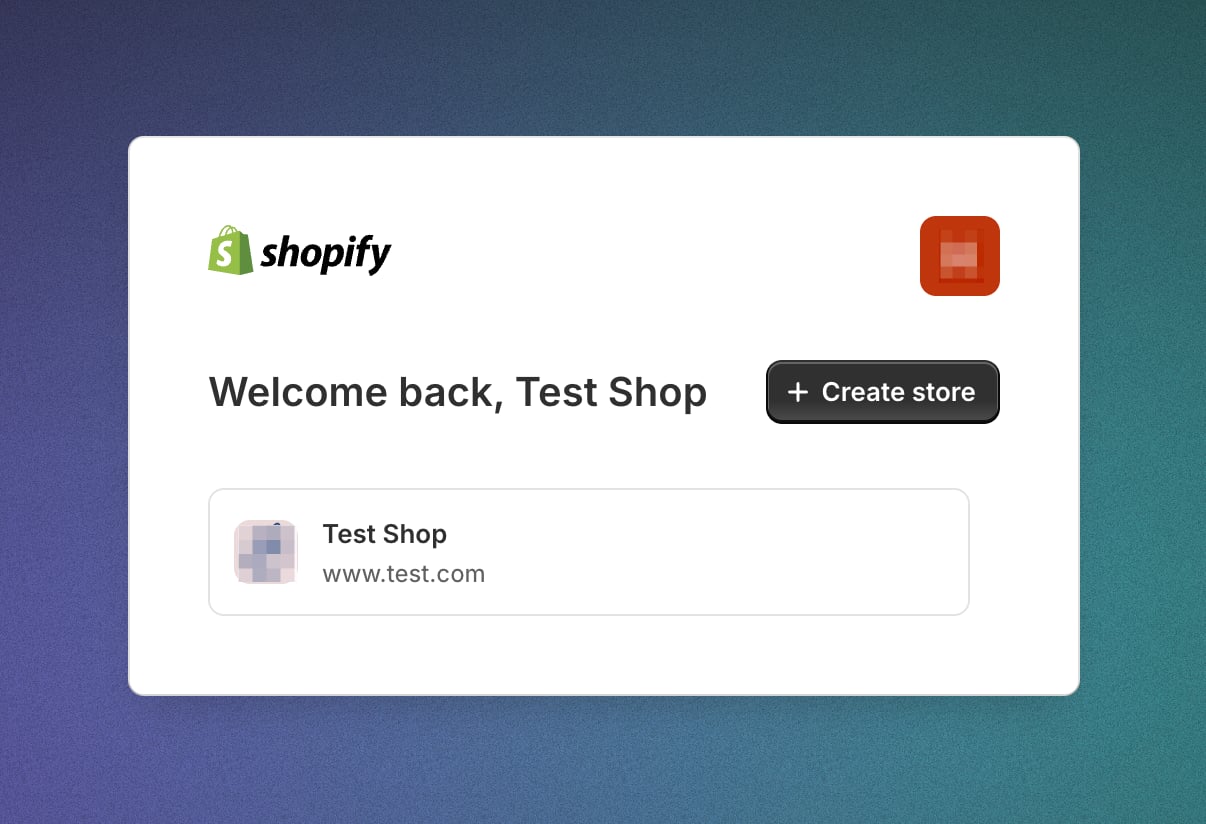
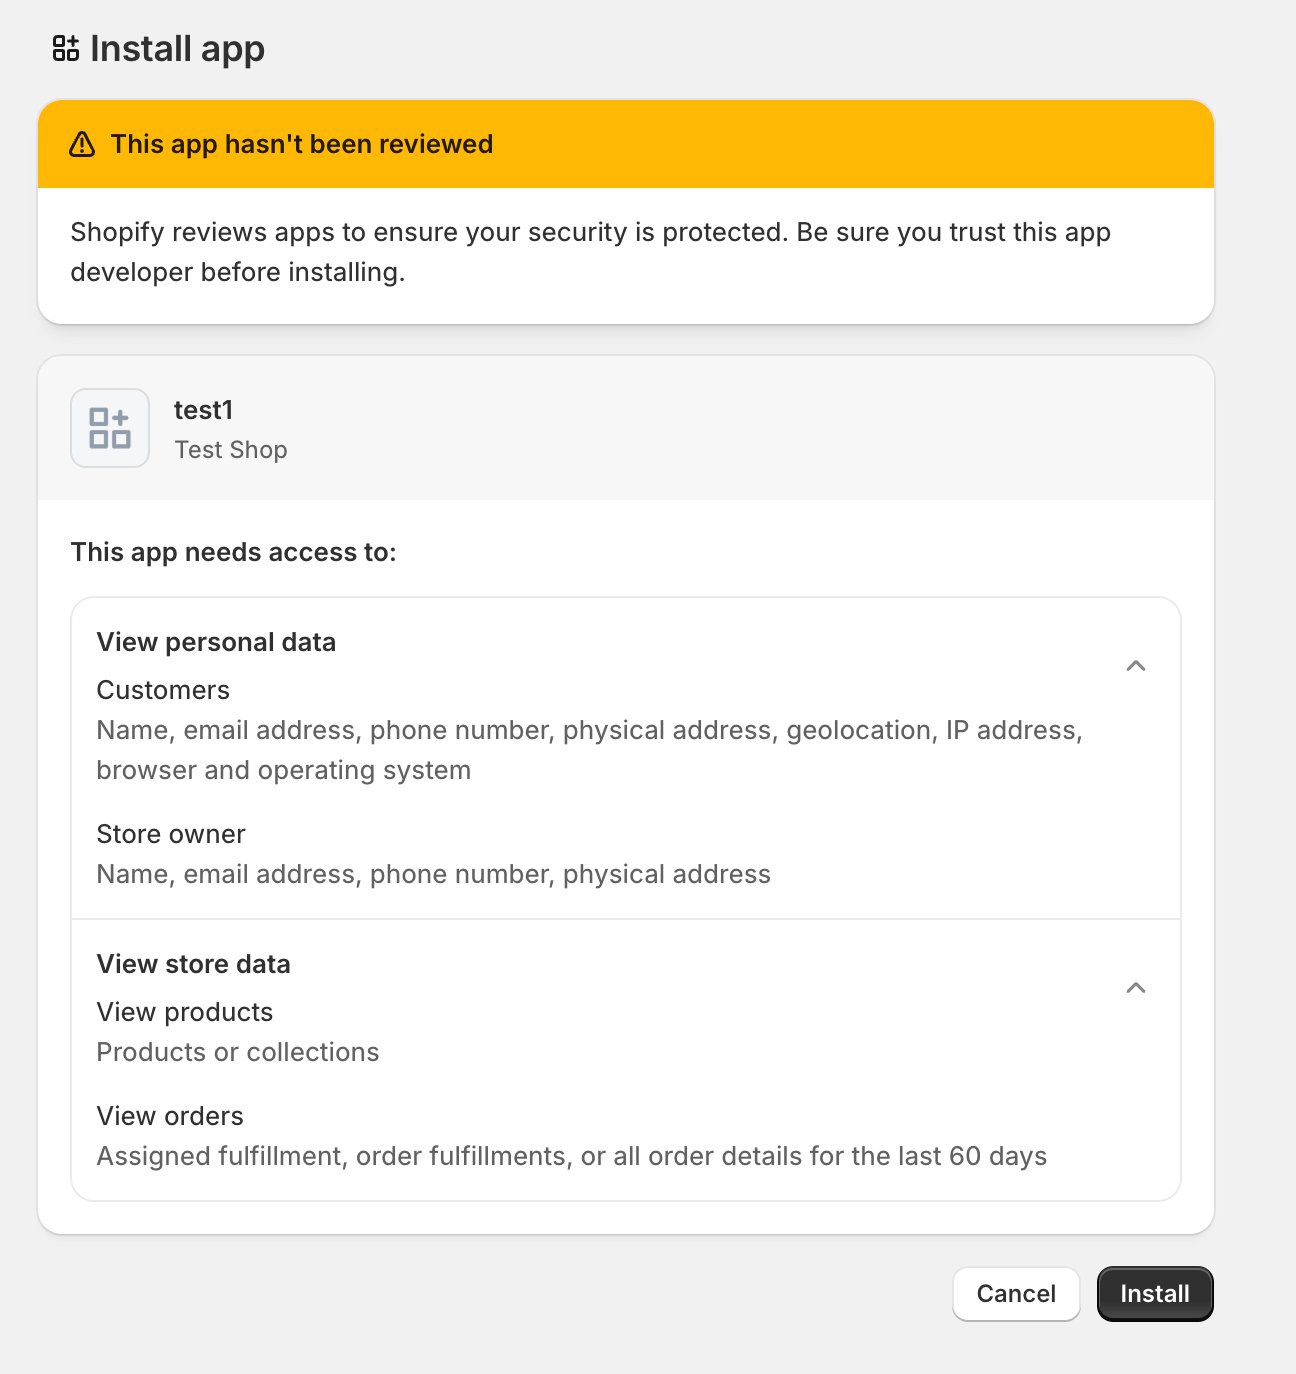
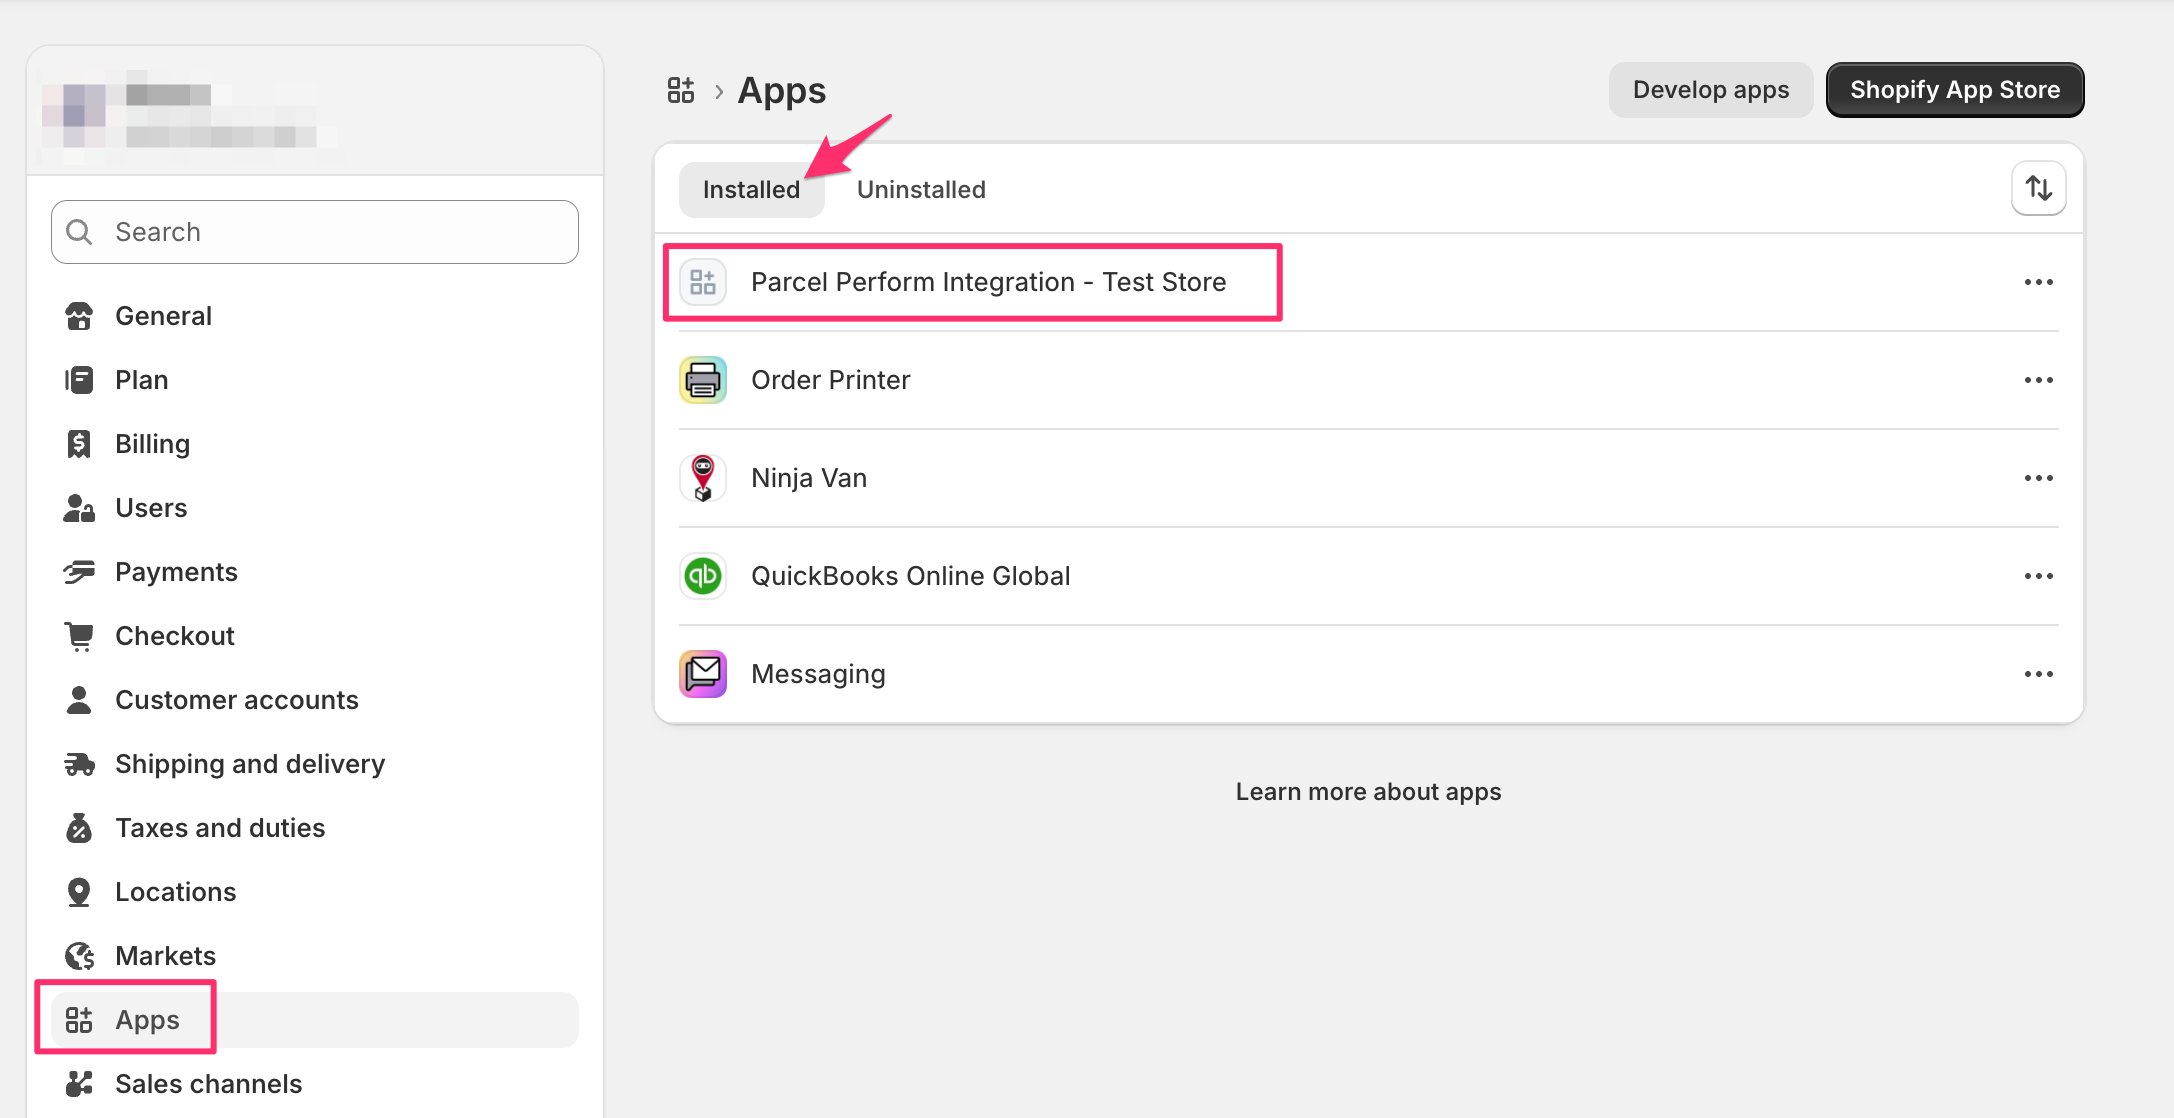
Go to Home → Install app → Install, pick the store, and confirm the installation on the store’s Install App page. A successful install redirects you to the Perform.AI website; verify under Settings → Apps in your store admin that the app appears in the Installed tab.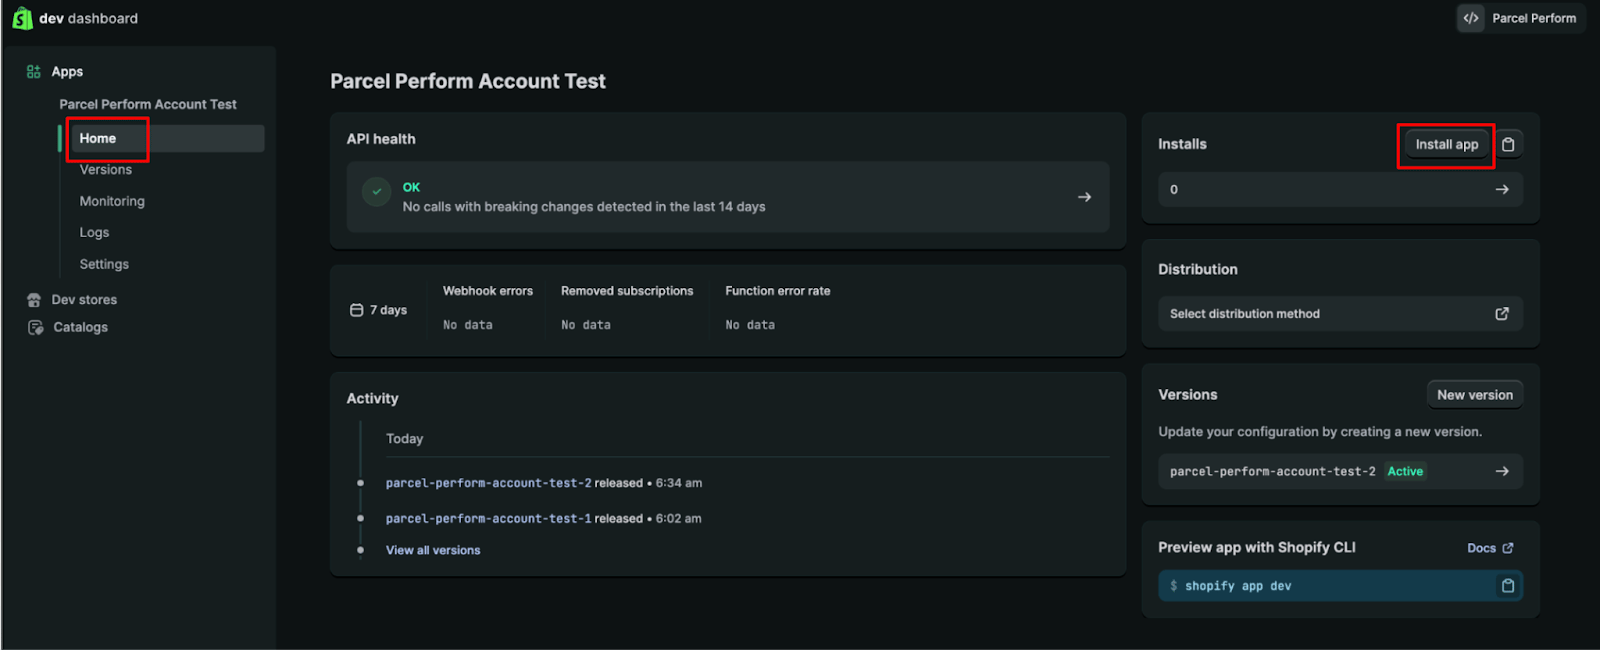
7
Copy the credentials into Perform.AI
Back in Dev Dashboard → App → Settings, copy the values into your Perform.AI integration panel: Shopify’s Client ID → the API Key field, and Shopify’s Secret → the API Secret Key field.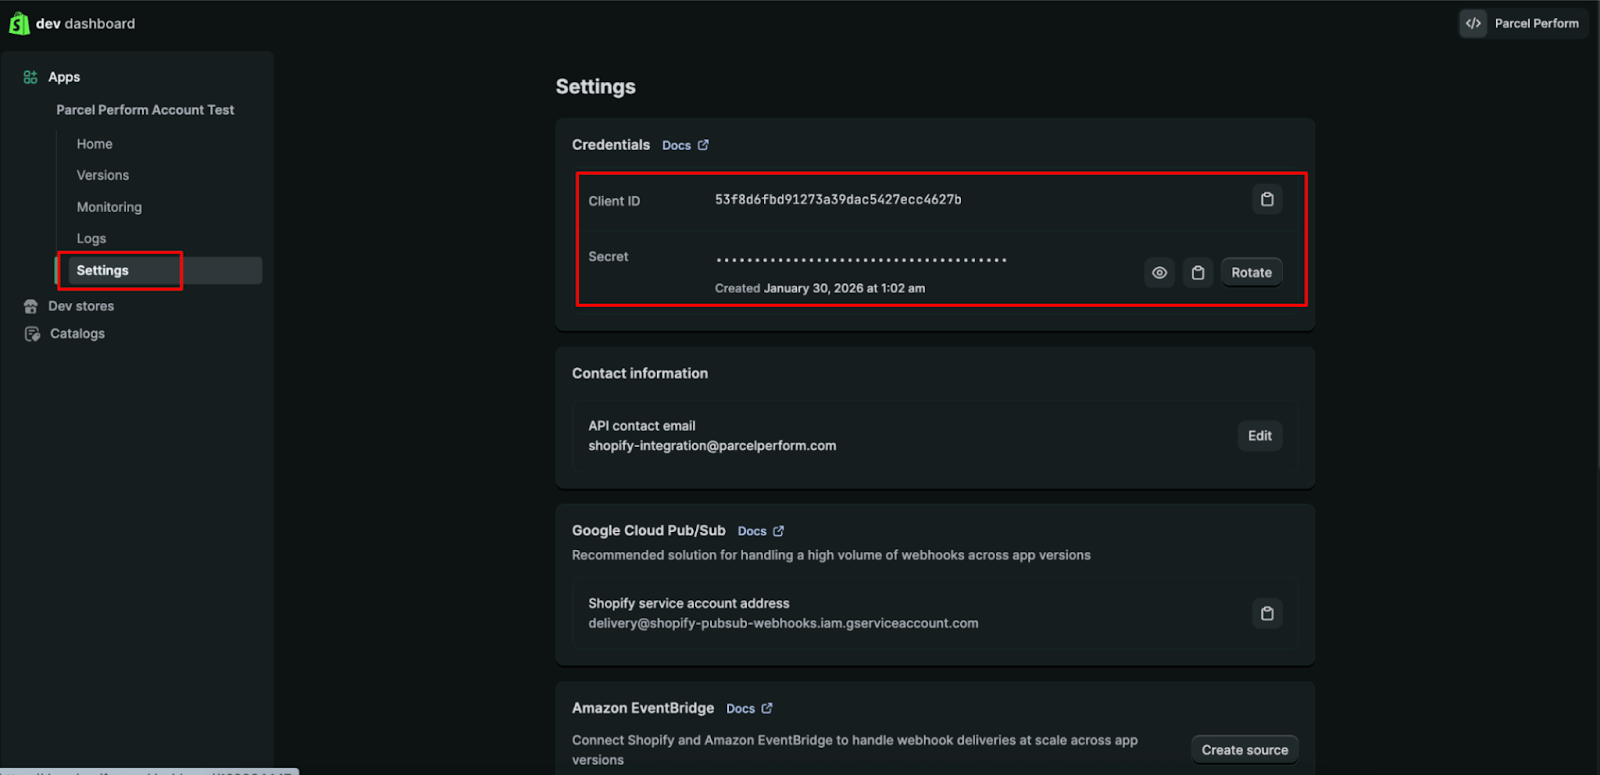
Step 3 — Save and activate
- Save the integration (bottom right) — leaving without saving loses your input. The integration’s status becomes Draft.
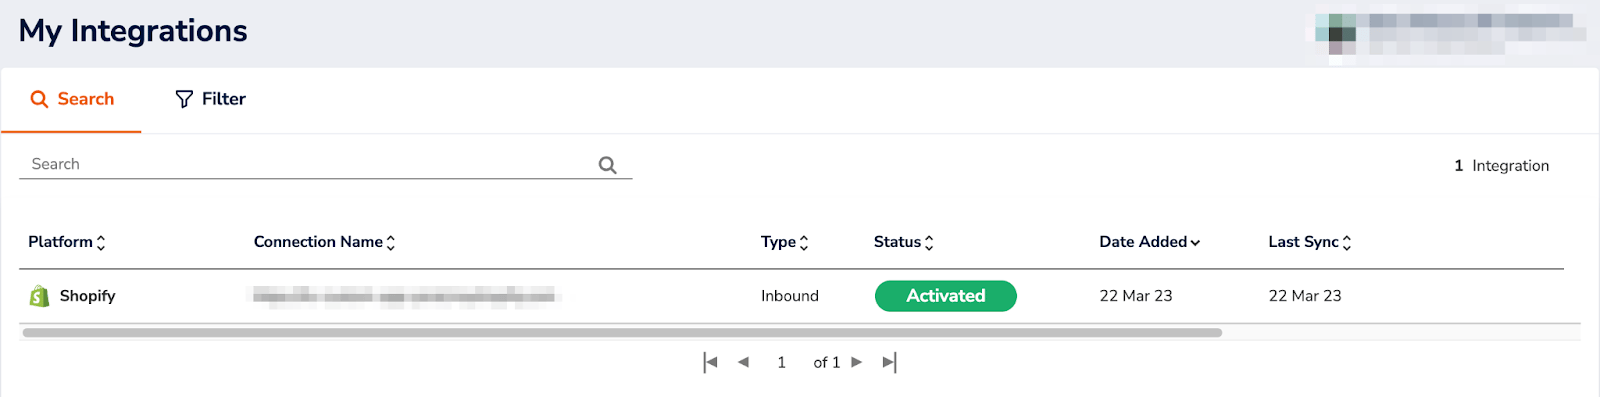
- Activate (bottom left). On success the status shows Activated (Connected) — “Activated” is the Perform.AI side, “Connected” is the app status reported by Shopify — and the integration appears as Activated in your Integration Overview.
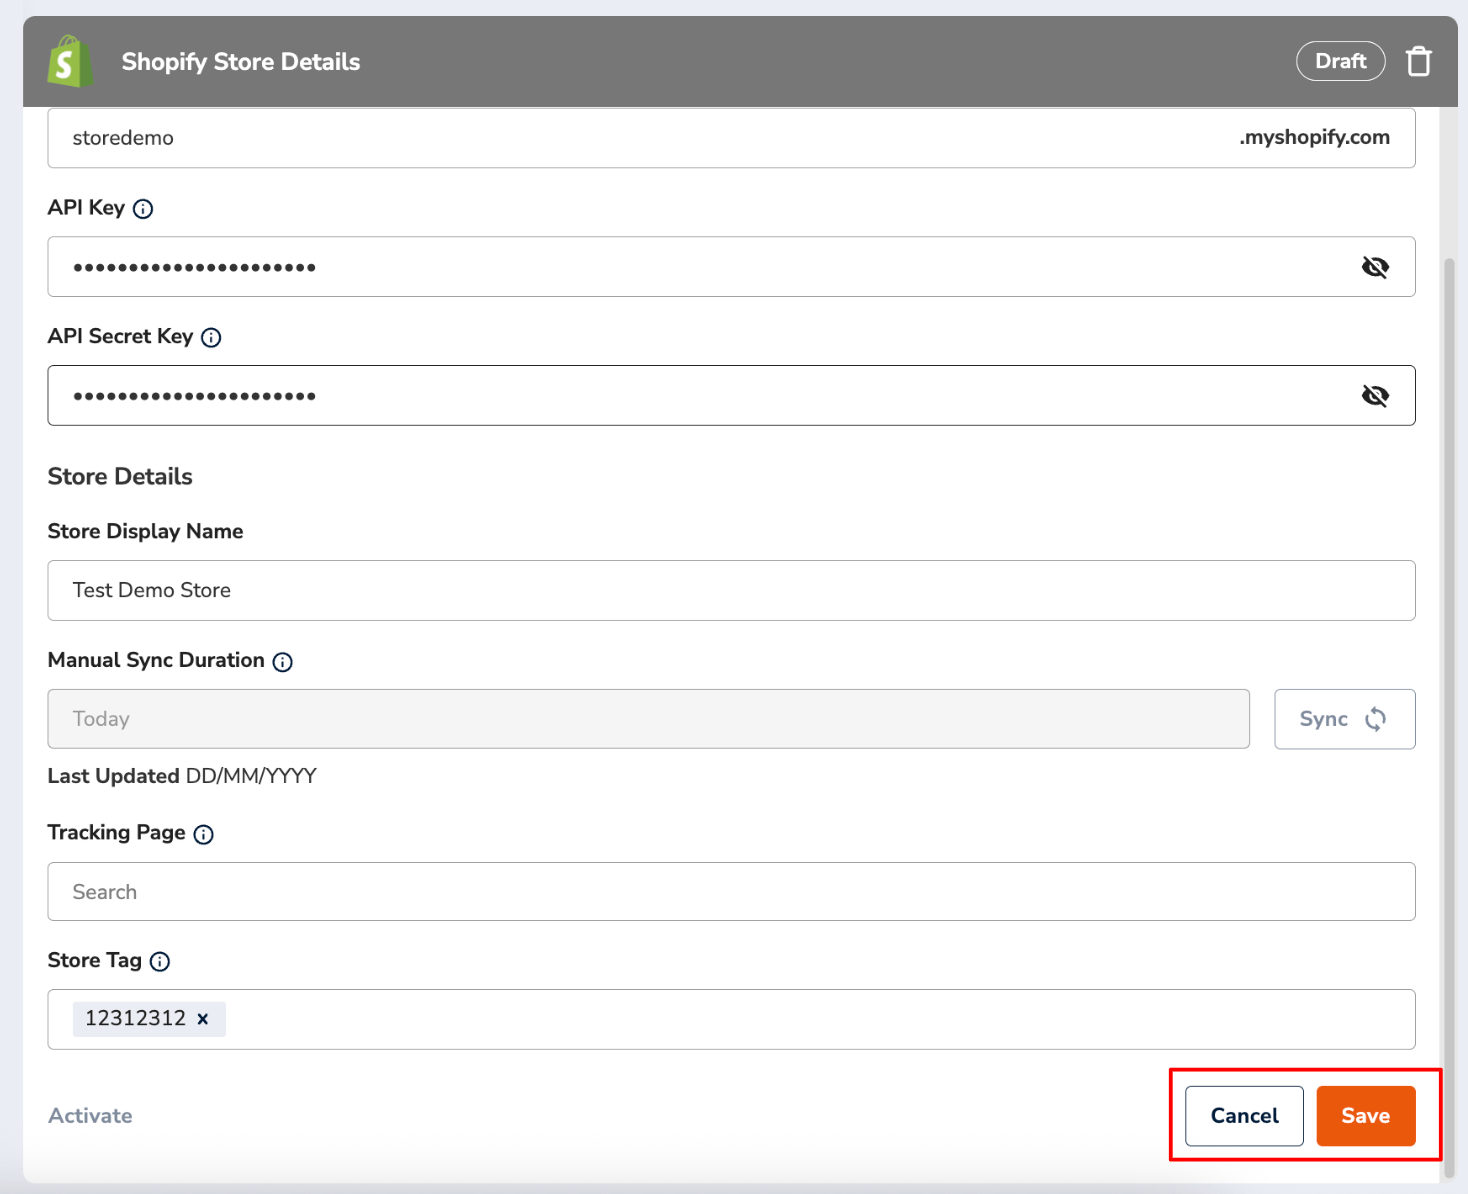
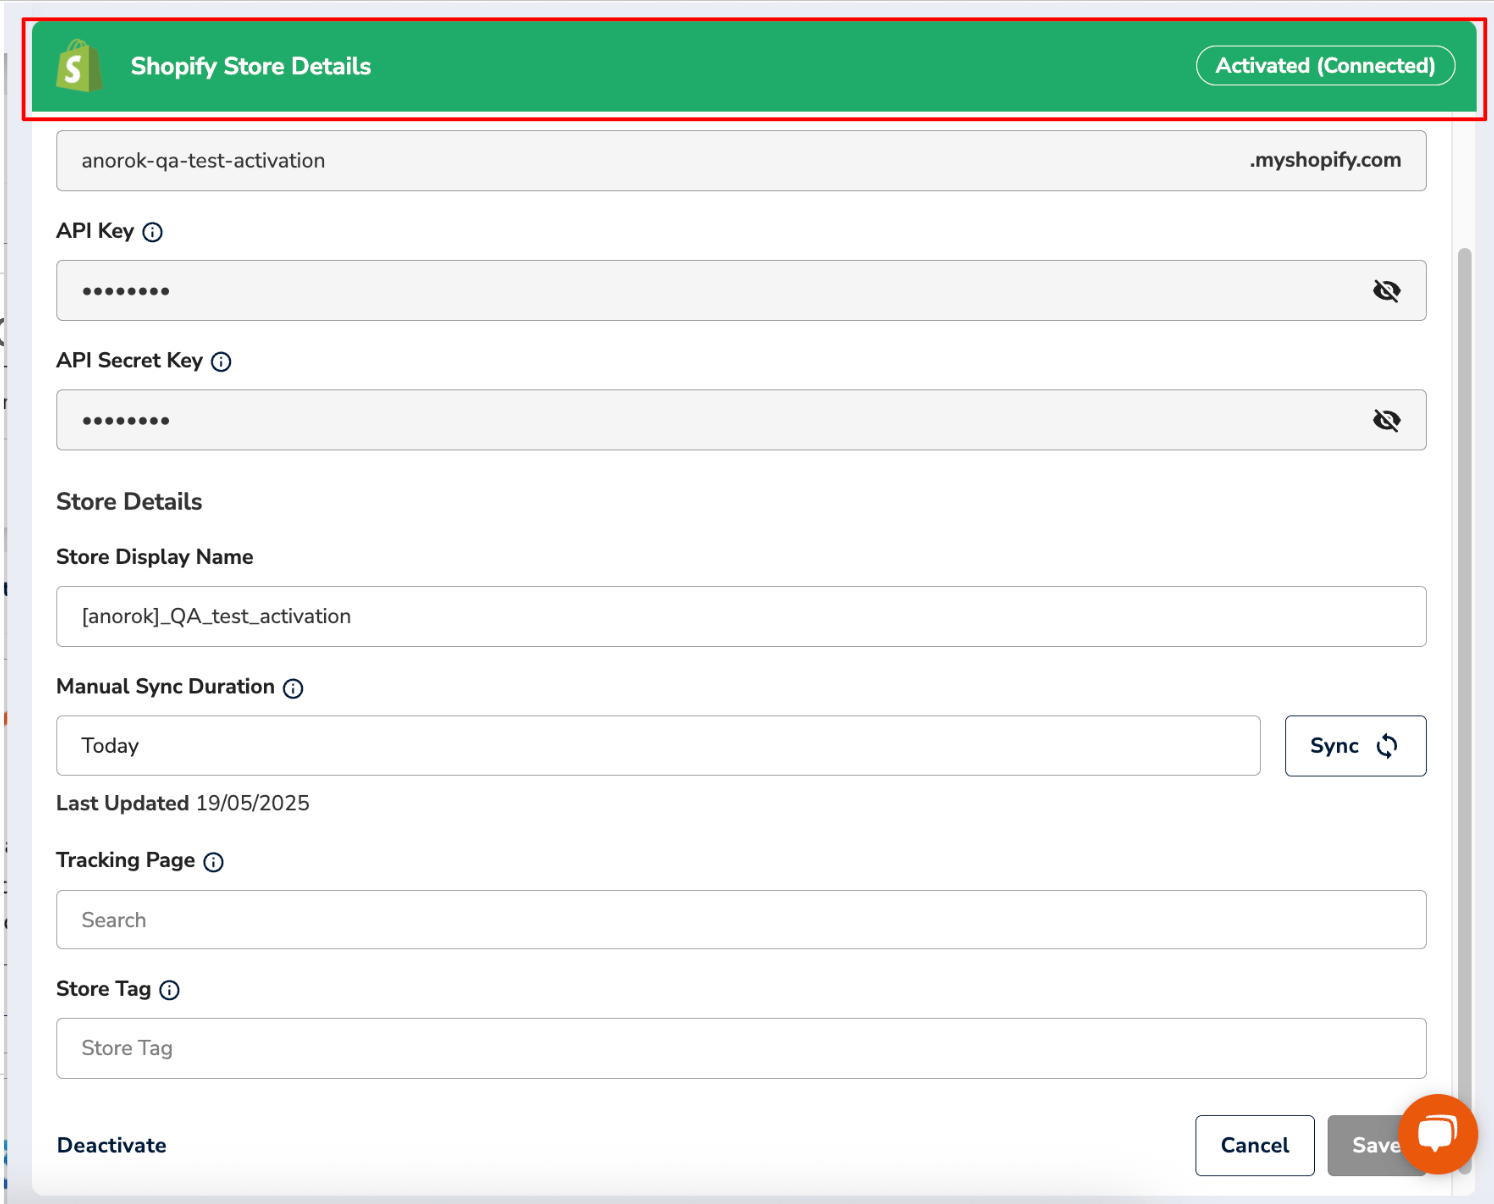
- Credentials display truncated for security — to change the API Key or Secret Key you must re-enter the full value, and only after deactivating the integration. Store details (display name, tracking page) can change while active.
- The trash icon (top right of the panel) deletes a saved integration.
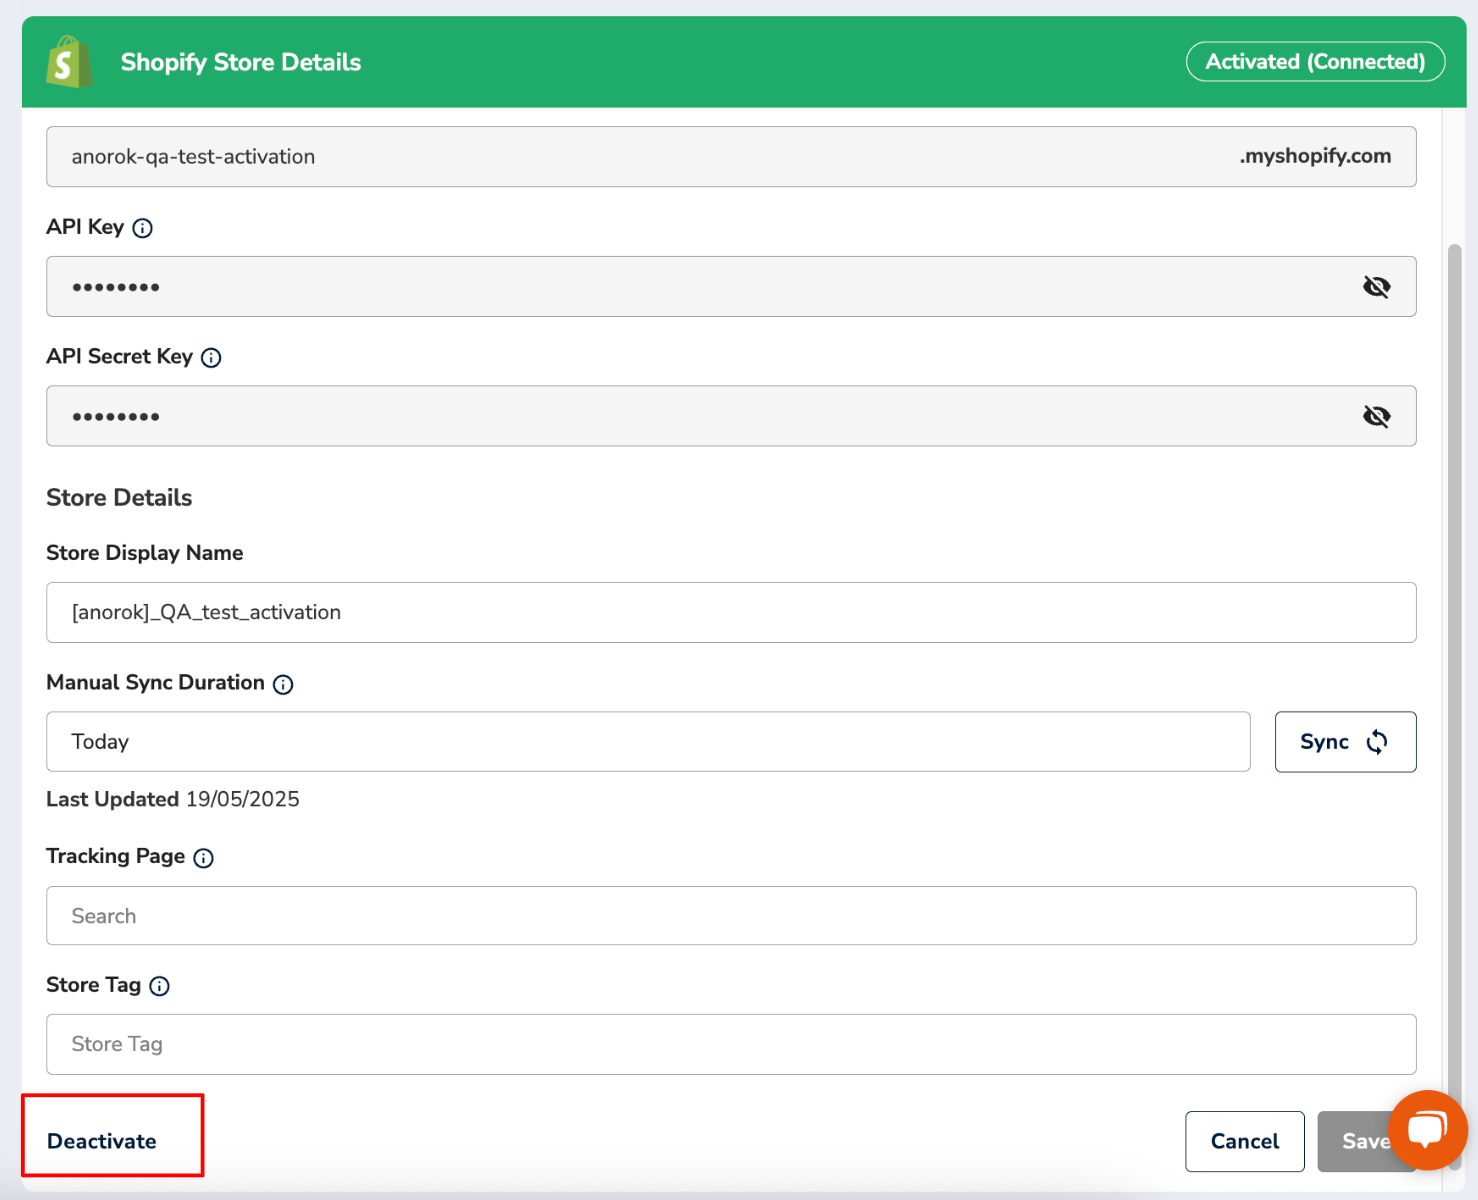
Your Shopify store is now connected — shipments import and track automatically from here on.